If you are going to have a solar power system that has a separated controller and inverter, then it is very important for you to understand what is the “Load” terminal that is available in the solar controller. Nowadays, hybrid solar inverters are becoming more popular since they contain the controller and the inverter in one package. This makes the installation process easier.
However, many people would consider having a separate solar charge controller and battery inverter a better, cheaper solution. These standalone solar charge controllers usually have multiple connection terminals, and one of them is the “Load” terminal.
Should I Connect the Load Terminal in my Solar Controller?
Connecting your solar controller load terminal is not mandatory. However, you could use it to connect DC loads, like LED lamps, DC fans etc… But again, it is not mandatory to do so. Your controller will normally work if no load is connected to it.
What are the Uses of the Load Terminal in the Solar Controller?
A solar controller is a device used to receive the harvested (generated) power from the PV solar panel, regulate that power (voltage and amper), and then send it to the batteries. Its main purpose is to charge the battery safely and to protect it from being overcharged or undercharged. That’s why it is called the “controller.”
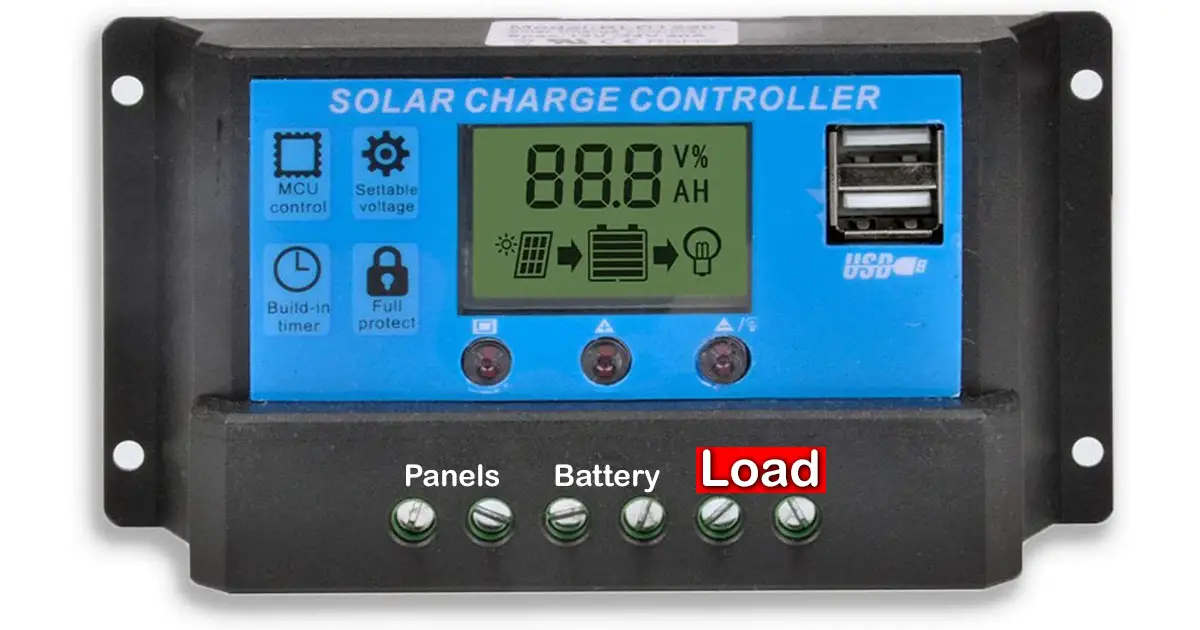
Most solar controllers have 3 input/output terminals:
1- Solar panels input terminal
This is a 2 port terminal (+ and -) used to receive solar panels’ power.
2- Battery output terminal
Again this is a 2 port terminal (+ and -) that will deliver the solar power to the battery and charge it. It will also regulate and control the battery capacity.
3- DC Load output terminal
This is the last terminal in the solar controller, which also has 2 ports (+ and -) that is used to deliver power for the DC loads.
Connecting your DC loads through this terminal is just like connecting it directly to the battery. The load terminal will provide power to your DC loads directly through your battery, depending on your battery’s voltage. However, you are limited to the amperage of the solar controller, so if your controller is 20A, then it will not handle more than 20A of load.
On the other hand, this terminal has an advantage over connecting your DC loads directly to the battery. The solar controller load terminal, also called LVD or low voltage disconnect, will automatically disconnect your loads from the battery if its voltage drops to a certain number, protecting the battery from being undercharged.
You should be cautious when using this port since overloading it will cause its internal fuse to melt, and the controller will be damaged.
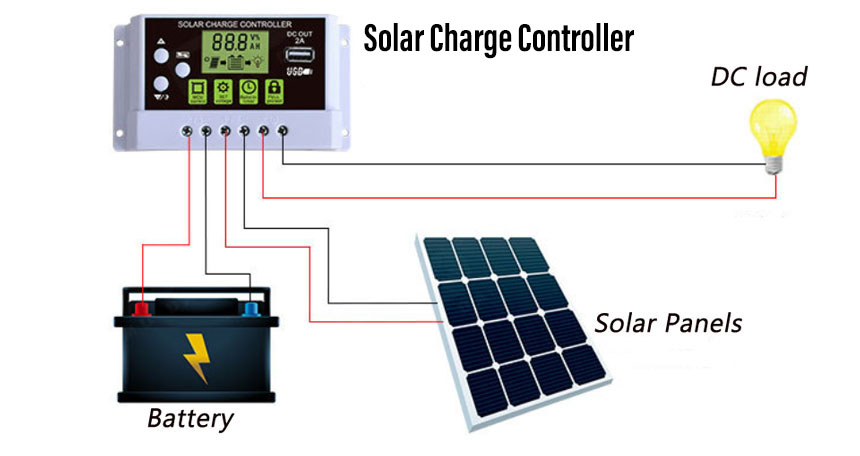
This video shows a simple connection of the solar controller to the battery, solar panel and load:
What Loads to Connect to the Solar Controller
Before knowing how to connect your loads to the controller, you should ask what I can actually connect to it? Let’s begin with the basics:
- Connect only DC load, NOT AC.
- The devices must be compatible with the battery nominal voltage.
- The total current consumed by the load must be under the rated current of the controller.
- Be cautious of certain inductive loads that have high inrush currents.
DC Loads Only
You must connect DC loads only to this port. Most of your home appliances are AC loads and shouldn’t be connected to this port. DC devices could be a simple DC LED lamp or a DC refrigerator. Just make sure you know what devices you are connecting.
Loads Operating Voltage
Not all DC loads are the same. Some will need a 12V power, maybe 24V power, or even a 48V power. So you need to make sure that your device is compatible with the battery bank and solar controller you have. You must read the technical specs of your device before connecting it to a DC power source.
Total Running Current
You should read the technical specs for each device you will be connecting to the load terminal. Sum up the current consumption that each device will consume. And make sure that the total number is under the allowed current by your controller. This is a very important step since it could cause damage to the controller.
High Inductive Loads are Forbidden
This is the time when you might think that if the load terminal is similar to connecting directly to the battery, then I could connect the inverter through it. And this is a big NO!
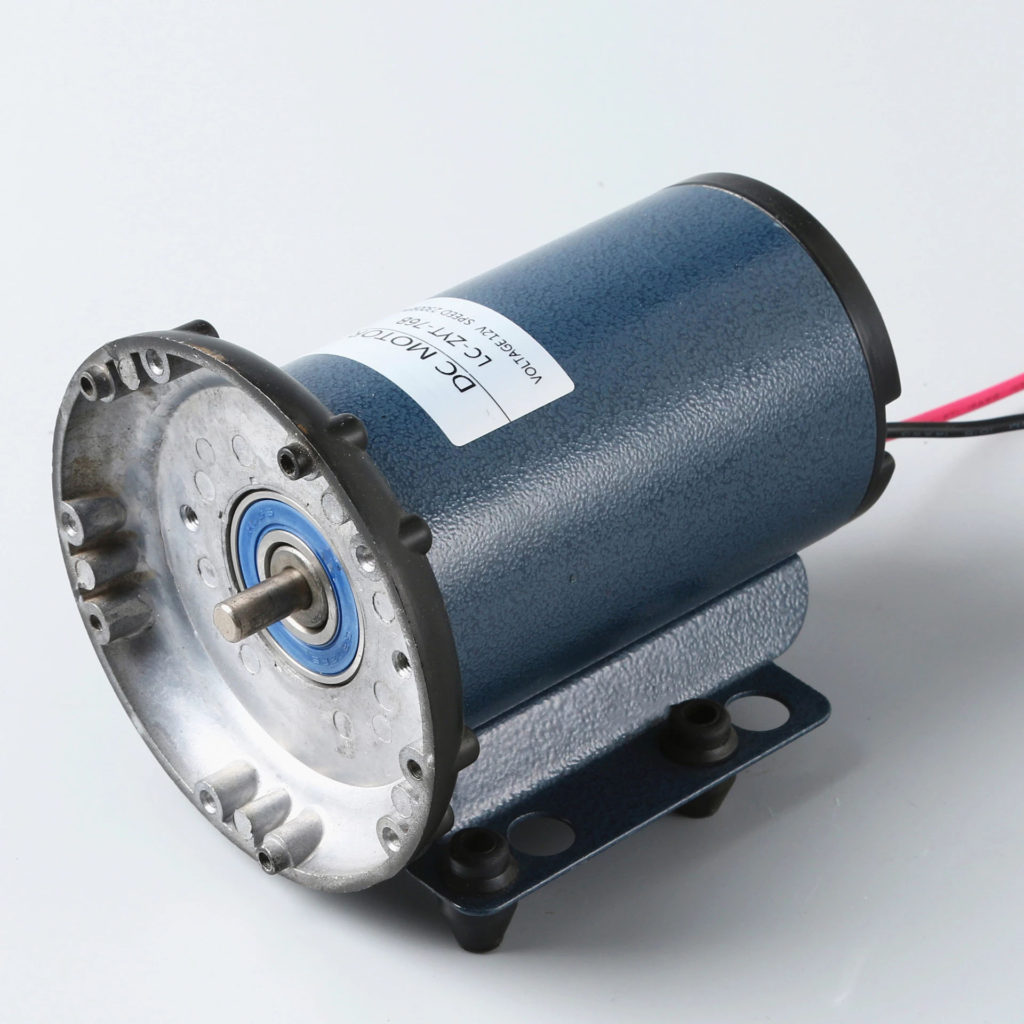
Even though you might be right in that the inverter takes DC as an input and provides AC as an output, you should NEVER connect your inverter to the controller load terminal. Inverters and DC motors are examples of highly inductive loads that need high inrush currents. This means they could demand currents as high as 20 times the normal currents they need to run.
Here is a table with some DC loads that could be connected and some that shouldn’t be connected to the load terminal:
| Allowed DC Devices | Forbidden DC Devices |
|---|---|
| DC LED Lamps | DC motors |
| DC Refrigerator | Solar Inverters |
| DC Fans | DC compressor |
These are just an example of devices that could be connected and couldn’t be connected. However, the exact answer depends on the device operating current, inrush current, and the rated voltage. Let’s take an example:
Let’s say your controller is rated at 20A and 12V. This means it is connected to a 12V battery or multiple batteries connected in parallel. You got a small DC pump with a rated voltage of 12V, operating current of 1A and inrush current of 5A. Then, in that case, it is allowed to be connected to the solar controller load terminal.
However, if your DC pump is a bigger one that is also 12V and has an operating current of 5A, but its inrush current is 20A. In that case, you will be risking damaging your controller because you have reached the limit of the controller rated current. Got the point?
How to Connect Loads to the Solar Controller
When connecting loads to the solar controller, you must be careful. There are multiple steps that you need to do before proceeding:
- Calculate the total operating and inrush currents of your load.
- Determine the operating voltage for each device.
- Start the wiring process carefully by determining each device’s positive and negative terminal.
- Lastly, make sure your controller load switch is turned off before connecting the load wire.
By examples, we always understand better, so let’s consider the following example:
I have a 20A 12V solar controller, and I want to connect to it the following:
- (5) LED bulb lights 9 watts, 12V, 1A.
- (1) 4.3A 12V or 2.2A 24V DC refrigerator.
- (3) 1A 12V DC fans.
- (1) 60W 12V 5A iPhone charger.
Let’s add everything to a table:
| Device | Voltage | Operating Current | Inrush Current |
|---|---|---|---|
| x5 LED bulbs | 12V | 1A x 5 = 5A | 5A |
| DC refrigerator | 24V | 2.2A | 4A |
| DC refrigerator | 12V | 4.3A | 8A |
| x3 DC fans | 12V | 1A x 3 = 3A | 1.5A x 3 = 4.5A |
| iPhone Charger | 12V | 5A | 5A |
| Total: | 12V | 17.3A | 22.5A |
Taking a look at the above table, you will first notice the red row, which is the 24V DC refrigerator. We removed this device since it is a 24V DC device and our controller and batteries operate just 12V DC loads. You will also notice that the total voltage at the last row is just 12V, while the operating current and inrush current has been added. This is because we will connect our load in parallel so that the total voltage will remain the same.
This video shows you how to connect lamps in parallel:
Now taking a look at the total operating current, it is 17.3A, which is less than the 20A rated current of the controller; that’s good! However, when you look at the total inrush current, you will find that it is 22.5A, exceeding the allowed current by 2.5A, now that’s not good!
This load calculation is an example showing you that these devices shouldn’t all be connected to the controller. You must always calculate your loads before connecting them to the solar controller.
Next, you will have to connect all this load in parallel and get ready to place the wire into the solar controller load terminal. But before that, you will have to make sure that your load switch is turned OFF, then you will connect the wire, and lastly, you will turn ON the load switch. This is how you could safely connect DC loads to the solar controller.
Final Words
The “Load” terminal in the solar controller is a DC power output that is delivered from your battery. This terminal has certain limitations that you need to take into your consideration before connecting any loads to it, and we already explained that deeply in this article.
This terminal is an “optional” DC output port that is not mandatory for your solar power system functions or your battery’s lifespan. If you need it, use it cautiously and follow the steps we showed in this article for how to do so. But if you don’t need it, then just leave it and don’t worry about it.